The Tiny Table

Life's better at the tiny table.

Choose Your Booze French Onion Soup

French onion soup is a dish I love to make. It’s therapeutic to stand over a pot of onions and coax them from their raw state into the sweet, tender and beautifully golden strands that make French onion soup so good.

When my husband told me he didn’t like it, I pressed him. Why? This soup has EVERYTHING you love. Onions. Beef stock. Bread. Cheese — loads of awesome cheese. So what’s the deal? He claimed it was too messy. I solved the problem by using cubed bread and toasting it in the oven before adding the soup and cheese. It’s all the awesomeness of French onion soup without having to mess with a thick slice of bread.

French Onion Soup

Getting the hang of caramelizing onions takes a few tries and a ton of patience. I couldn’t wrap my head around how long it really took to get the onions to break down. So if it’s your first try at French onion soup, check out the photos and guide to help you out. I show you step by step what your onions should look like and a time frame. Scroll down to the recipe if you already know the process.

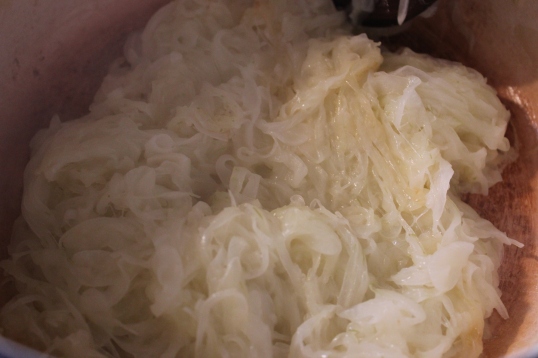
White or yellow onions work best for caramelizing. I use a mandolin to slice them as thinly as possible. It makes the process go quickly, too. Add your raw onions to the pot with melted butter and oil on medium-low heat and give them a good stir to coat.

Raw Onions

Place the lid on the pot and let it cook for 10 minutes. Give it a stir then replace the lid and cook for another 10 minutes. Remove the lid and stir. Another 5-10 minutes and the onions will start to take on a light golden brown. In the photo below you can see how the onions are soft and starting to break down. But seriously, 25-30 minutes in and this is all the further we’ve gotten? Ridiculous.

Light Golden Brown Onions

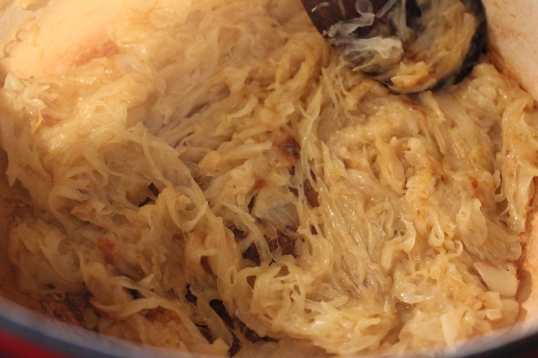
You’ll want to keep an eye on your pot from here on out. The step of caramelized onions to burnt onions is shorter than you’d think. Crank up the heat to medium-high and add in your sugar and salt. In the next 10 minutes, your onions will start sticking to the bottom of the pot and develop a deep brown color. I see you little brown specks! Don’t hide from me! Stir them constantly to keep them from burning. Don’t worry about the layer sticking to the bottom of the pan. We’ll deal with that.

IMG_1732

Hurray! Your onions are caramelized. You can actually do something with them now. Make French Onion soup! Bring on the booze! Alternatively you can use this for a topping on burgers, in a dip, or for something else.

Caramelized Onions

Traditional French Onion soup uses white wine with beef stock. Whatever, fancy French cooks. I am more of a “what’s in the fridge” sort of cook. I’ve made this recipe with white wine, red wine, and beer. Use a dry wine – either a Sauvignon Blanc if you choose white or a Cabernet Sauvignon if you want to use a red wine. My husband picked this red wine for me based on the “cool label” and it met the “dry red” I asked for.

red wine

Wine? Pssh. You’re here for the beer. What kind of beer should you use? I recommend darker ales and stouts. Smithwick’s is a good choice and you can’t deny Guinness is awesome for cooking. You can use any good Scottish ale or a nice stout. Porters and brown ales are a good choice too. I don’t like using IPAs because their hoppiness leaves the soup a little too bitter.

Choose Your Booze French Onion Soup

3 tablespoons unsalted butter
1 tablespoon extra-virgin olive oil
1 1/2 lbs yellow onions
1 teaspoon sugar
1 teaspoon salt
1 tablespoon all purpose flour
4 cups beef stock
12 oz beer or wine of your choice
cubed bread, toasted
1/2 lb shredded Gruyere cheese
minced fresh thyme for garnish

In a large soup pot with a lid, melt the butter and olive oil over medium-low heat. While the butter and olive oil melt, slice the onions with a mandoline or use sharp knife so your onions are as thin as possible. Add the onions to the butter and olive oil and stir to coat. Cover and let cook for 15 minutes. Stir the onions and cover again for 15 minutes. Remove the lid and add the sugar and salt and raise the heat to medium-high. Continue cooking, stirring more frequently. Once the onions are a deep brown color and start sticking to the pot, reduce the heat to medium low. Sprinkle in the flour and cook 2-3 minutes. Add 1 cup of beef stock to deglaze the pot, scraping up the onions and brown bits stuck to the pot. Stir in the remaining stock, add in the alcohol and turn the heat to low. Cover the pot again and let the soup simmer for at least 30 minutes to combine the flavors.

While the soup is simmering, heat the oven to 425 degrees. Cut the bread into cubes and spread out on a sheet pan covered with foil. Drizzle with olive oil and sprinkle with salt and pepper. Toast the cubes in the oven until golden about 5-8 minutes.

Place the bread cubes in oven safe soup bowls. Ladle the soup onto the bread cubes and top with a generous amount of shredded cheese. Set onto a sheet pan covered in foil and bake for 10-12 minutes until the cheese is melted and browned to your liking. Let cool for 5 minutes, then enjoy!

The Ballet Blogs

It’s been a long while since I paid attention to this little corner of the universe. The good news is, I have had so many great things going on, it seems like only yesterday since I was here.

We recently enrolled Holly into ballet classes and the school is just far enough away from home so I hang out in the lobby while she’s in class. There’s wifi and strains of classical music coming from the rehearsal space. So instead of perusing Pinterest or Twitter, I’ll use the time to take care of The Tiny Table.

It’s the perfect time for a little blogging. I won’t be sharing dance mom stories (there are actually just as many dads here as moms, all on their iPads as well). Instead, I’ll be sharing some recipes, some stories and some things we’re doing in our family.

20130223-103055.jpg

Earth Fare Opens in Indiana – GIVEAWAY!

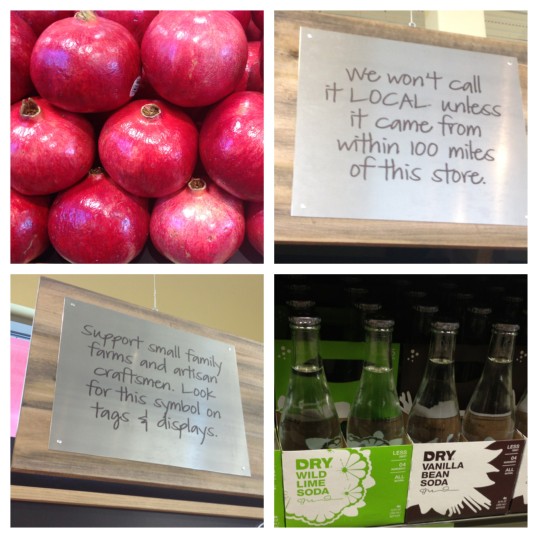
Central Indiana is home to a fare share of health food stores and specialty markets, however the news Earth Fare was opening a location on the north side of Indianapolis sent many of us foodies into a tizzy. Earth Fare is out of North Carolina and the location opening Wednesday, November 7th at Hamilton Town Center is the first location in Indiana for the chain. Think Whole Foods, Trader Joes, Fresh Market.

I had the chance to get a sneak peek yesterday with Sara and to say I was impressed is an understatement. Earth Fare has a Food Philosophy which they stand by for every product in their store. No high fructose corn syrup, no artificial flavors, no bleached or bromated flour, no artificial fats or artificial trans fats, no artificial sweeteners, no antibiotics in meat or dairy, no artificial colors, and no artificial preservatives. Whew!  They also offer free butchering, seafood preparation and fromage (cheese) services.

Earth FareI really liked Earth Fare’s policy to sample anything in the store. You want to try something? Flag down an employee. They’ll open anything up and let you try it. I was also blown away by the wellness section. It had over a dozen sample sizes and travel sizes (hello stocking stuffers!) of cool products that are perfect for those of us who hate makeup, lotions and soaps made withe chemicals. They also carry my favorite soda, DRY Soda, the first store in the state to do so.

Earth Fare also believes in being a part of the community. Each Thursday night, they host Family Dinner Night from 4-8pm. We’ll be checking it out this week with Holly while I stock up on Throat Coat, fancy shaped pastas, cheese, pickles, and more.

By far, the coolest thing I saw setting Earth Fare apart from the local competition is the Ravioli Case. I’ve never seen a frozen bulk ravioli case before. You can mix and match as much or as little as you want into a container. I can’t wait to try them all.

Ravioli Case

Now this is where I typically go into beer and wine selection, but unfortunately, Earth Fare has to wait for Hamilton County to issue a permit. Trust me, I’ll be the first one in line when it’s available.

Earth Fare $50 Gift Card Giveaway

Here’s the fun part, I have a $50 gift card to giveaway to one lucky reader! Here’s how to win:

I’ll pick a lucky winner at random on Friday November 9th, 2012 at noon EST. (If you want to double down on winning, head on over to Solid Gold Eats for Sara’s review and Ann-Marie’s Chaos is Bliss for additional giveaways. Score!)

*Disclosure: Earth Fare contacted me about a tour of their new facility in Noblesville, Indiana and provided me with the gift card for a giveaway. All views expressed in this post are my own.

Foodie Pen Pals for October

I love getting things in the mail. While online shopping is fun, receiving packages from friends is much more exciting. While perusing a selection of food blogs, I found The Lean Green Bean. Lindsay created the Foodie Pen Pals in which participants send boxes full of goodies to each other once a month. It seemed like a neat way to connect with other bloggers and try out their favorite foods and treats.

Foodie Pen Pals

The Foodie Penpals have a few rules including deadlines for contacting your pen pal, sending your treat box and posting your reveal blog. The rules make sense and are easy to follow. Another part of the program is while you send your pen pal something, someone else has your name so you connect with TWO people each month you participate.

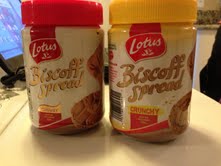
My October box came care of Seth. He doesn’t have a blog but he does have a Twitter account and his photos of his culinary adventures around Chicago can be found @ChiCityFoodie. Give him a follow! Seth sent me 2 jars of Biscoff spread. Biscoff cookies are THE airline cookie. I had never heard of it being used to create a spread before and can’t wait to try it out on my English Muffins!

Biscoff Spread

If you’re interested to see who my pen pal was, you can check out Shaunna’s blog Tempting Thyme! All in all, I think it’s a great program. I’ll be participating again in November!

Start Canning – In The Fall!

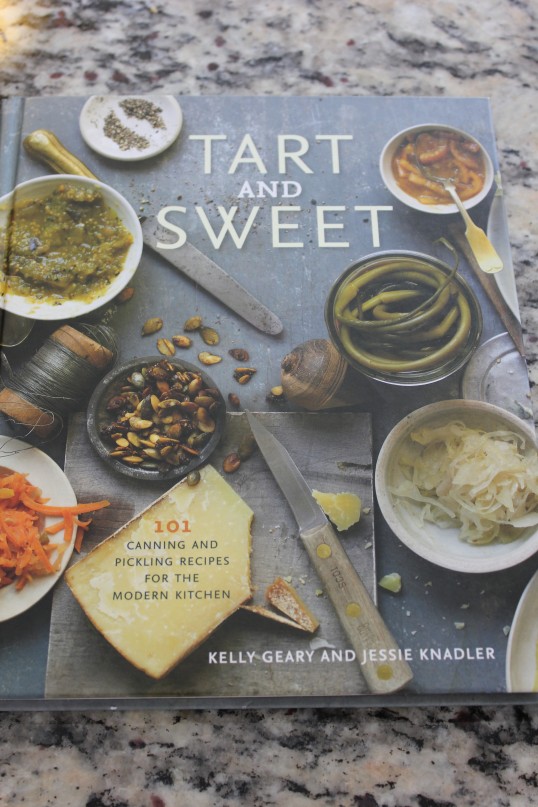
Last year was the first year I had ever canned. Canning is preserving food in glass jars (so why is it called canning and not jarring?). I had received a copy of Tart and Sweet: 101 Canning and Pickling Recipes for the Modern Kitchen from my good friend Sara for the holidays and my life has never been the same. Tart and Sweet is different from most canning cookbooks. Instead of separating chapters by food type: pickles, jams, jellies, relishes; Tart and Sweet is organized by season. So it’s easy to start canning items available now and save the fruit preserves for the spring and summer once you have more experience. It’s also small batch canning. My favorite recipe makes a whopping 2 pints of pickled garlic.

Tart and Sweet

Fall is the perfect time to start canning. I know this sounds counter intuitive, but stick with me here. Canning can seem daunting with buying supplies, hot and steamy kitchens, worrying if you’re going to kill your family and friends with botulism, and setting jams. Fall negates most of these perceived problems for you.

Canning supplies are on sale in autumn months. Right now I’m finding canning starter kits on sale, deals on jars and lids, and clearance prices on food mills, labels and more. You can give canning a try with minimum investment. A big canning pot is not necessary. I started canning using my stockpot with the Ball Canning Discovery Kit which comes with 3 jars and Ball Canning Utensil Set. Reading through Ball’s Getting Started site and canning blogs are a huge resource. There’s also the Ball Blue Book Guide to Preserving. In addition to recipes, it has every question answered and a great FAQ section on what to do in situations where things to awry. Once I was convinced I wouldn’t be poisoning my family I was ready to go. If the jar didn’t seal? Refrigerate it and eat the contents within a few weeks. I started my canning journey with an investment of $38.00!

Canning set up

I have major aversions to canning in the summer. My kitchen gets hot and steamy while canning. I don’t like standing over a stove stirring jam when the rest of my family is out running through the sprinkler. Fall is the perfect time to can in the evenings with a mug of hot cider while making apple butter. You stay nice and warm without cranking up your thermostat.

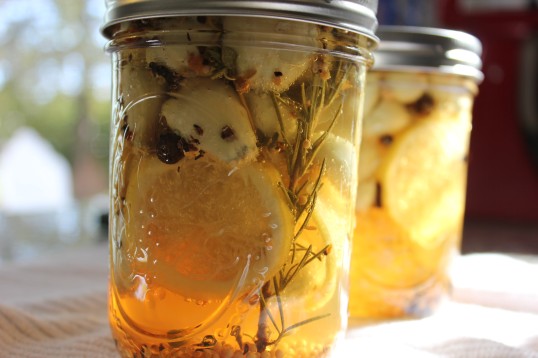
The very first recipe I tried out of Tart and Sweet was Lemon Herb Pickled Garlic. I adore garlic and this makes such a beautiful gift. All of the herbs, lemon slices and garlic cloves. Yum! The recipe only makes 2 pints which fit perfectly with the Ball Canning Discovery Kit since it came with 3 jars.

Garlic

Pickling foods is much easier than making jam. After your jars are sterilized, you fill them with the food, then fill the jar with a vinegar solution. No pectin, no sugar content, no setting. Processing the jars consists of lowering them into boiling water and setting a timer. Pull them out, let them cool and listen for the POP of the lids creating a seal. That POP is extremely satisfying.

Lemon Herb Pickled Garlic

This might seem like a huge advertisement for Ball, but they truly know their stuff. They’ve been around for 125 years. The equipment is high quality and the resources they provide to home canners is unbeatable. Investing in the right equipment the first time is much better than replacing cheap stuff as it breaks. After a year of canning, I now teach my friends how to can. I host canning workshops with Sara. I give gifts for birthdays and the holidays or just because. If canning is something you’ve been interested in but haven’t started, now is a great time to try it out.

The Care Kit

Ever feel like life just threw you a huge curve ball? Whether it’s a call from your husband’s teammate: “Can you come pick him up?” (torn MCL’s and lacerated kidneys, HOLLA) to a child having a serious accident, sometimes life isn’t fair. It’s times like those that The Mullins family jumps to action for a simple home cooked meal in disposable pans, accompanied by treats for both kids and parents. We call it The Care Kit.

Our version of The Care Kit includes a baked pasta dish, cookies, a bottle of wine or beer for mom and dad, and flavored milk straws for the kids. I can assemble the baked pasta, cover it with foil, and write the baking instructions in about twenty minutes. My local grocery store has a sweet selection of aluminum foil pans so I keep a few on hand. I don’t lend out my glass bake ware after someone took eight months to return a dish.

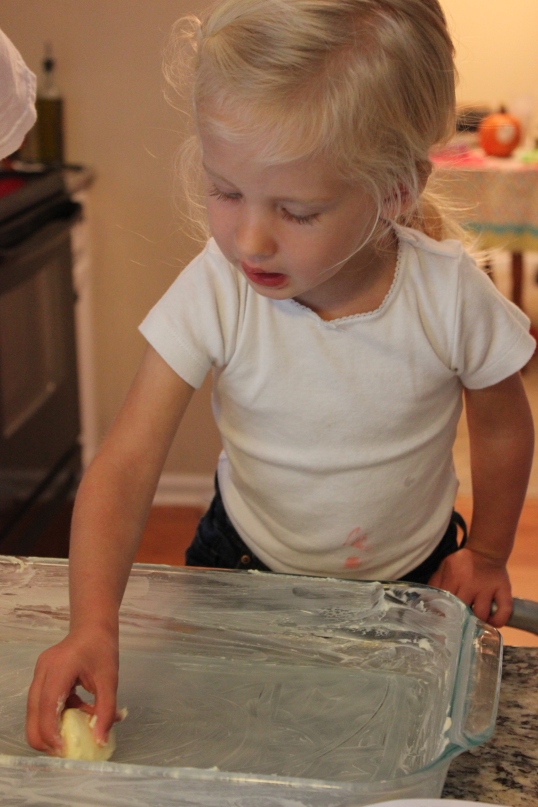
Buttering a baking dish

The point isn’t that we made some big gourmet meal or really wowed anyone. If we were able to relieve just one stress off of some friends, then the mission was accomplished.

Care Kit Ingredients

1 box cool shaped pasta (rigatoni, fusili, stellina, etc)
1 jar pasta sauce (I use Classico Tomato Basil)
2 cups shredded mozzarella (that’s a standard bag of shredded cheese)

How To

Boil pasta to al dente per box instructions. While water comes to a boil, combine your pasta sauce and 1 cup of shredded cheese in a bowl large enough to mix in the pasta. Once pasta is cooked, drain in a colander and add to the pasta sauce/cheese mixture. Spread into a 9×13 casserole pan, aluminum foil pan or 2 quart baking dish. Whatever you have or like best. Top with remaining cheese and it’s ready to go! Cover the pan with a lid or foil, and you’re done! Include baking instructions: 350 for 20-30 minutes until heated throughout and top is brown and bubbly.

Add Ins are where you can get all fancy but honestly, keeping it simple is okay too.

4 oz of cream cheese or Philadelphia Cooking Creme
Sauteed vegetables
Fresh herbs
Cooked protein – chicken, ground beef, ground turkey, cubed ham, tofu

In addition to the baked pasta, we throw in some cookies*. Holly and I make pumpkin cookies filled with oats and dried cranberries. The recipe is out of the Sesame Street Yummy Cookies: Baking With Kids book. It’s a board book full of recipes for healthy and not so healthy cookies featuring Sesame Street characters. The book holds up great to some spilled brown sugar and vanilla extract. Holly can flip through the pages and it stays open on the counter. It’s a cookbook to share with kids to foster a love of cooking. I recommend it. Spending the time with Holly in the kitchen is so special to me and explaining to her this meal isn’t for us is interesting. She picks up on the idea of helping others. I hope these lessons stick.

Pumpkin Oatmeal Cookies

*If we’re on a time crunch and homemade cookies aren’t going to make it into Care Kit, we throw in a few sleeves of Oreos.

Putting Away The Tutus

Wow, it sure has been a while! I’m sorry for neglecting my little blog but honestly? I’m sorry not sorry. I’ve spent the last two months soaking up the sun, jumping in bounce houses, camping in the backyard, canning and pickling everything I could get my hands on, the list goes on and on. Fall is now here. Holly is three. Football season is here. Pumpkins and flannel have replaced Popsicles and tutus.

Tutus and Smils

The Mullins House is calming down. Done are the late evenings chasing fireflies or listening to cicadas. Done are the early mornings to the farmers market. This weekend I’m taking a much needed day to visit a town I used to call home as a tourist.

I’ll be posting with more frequency. Up next is my Care Kit. What’s a Care Kit? The meal I make for friends and family when they need a break. Lacerated kidney? I’ll bring a Care Kit. Your child breaks his leg in 3 places? Be right over with a Care Kit. It’s incredibly easy and Holly helps me put everything together. In the mean time, I’m joining the Foodie Pen Pals and giving my health a front seat.

Farmers Markets: Navigating with a Toddler

Saturday mornings are special for the Mullins Girls. We leave Daddy at home and hit up our local farmers market with our good friend Sara from Solid Gold Eats. Part of the charm of the farmers market is teaching Holly about food. There is also the routine and connecting with the community. It feels good to buy real food from real people. 

Each week, I see general complaints on Twitter and Facebook that the market is too crowded, there are too many kids in strollers, or the selection is sub par. Of course, those complaints roll in hours after the market has been open. Here are my tips for a successful trip to your local farmers market.

Be Prepared
Use this handy dandy calendar to know what’s in season. Strawberries are gone. Tomatoes are taking over the world. Have an idea of what recipes you’ll be making and shop accordingly. 

Image

GET THERE EARLY!
Setting an alarm on a Saturday morning isn’t fun. I know. What is fun? Snagging the small first offering of heirloom tomatoes from the Amish produce stand. Trying to push a stroller through throngs of people AND getting produce isn’t my idea of a good time. So we go right when the market opens with no hassles.

Entertain the Kid
Holly and I have a routine. We get to the market and hit up A Taste of Philly for a pretzel. This keeps her happy, munching, and occupied while we shop.

Image

The Stroller
Some people’s aversion to the stroller is only rivaled by their primordial fear of Brussels Sprouts. In the case of the farmers market, a stroller can be your best friend. I have a cup holder for coffee, cargo space for sweet corn and whatever else we pick up. So in this case, go with the stroller.

The farmers markets are a great way for Holly and I to spend some one on one time together and treat ourselves without feeling guilty about it. I love seeing her point out food and interact with those around us. 

5 Ways to Include Little Helpers in the Kitchen

In November of 2010, I was pre-heating the oven for some chicken nuggets for Holly. I went to the freezer to pull out said chicken nuggets and the next thing I heard was a scream. Holly had crawled into the kitchen behind me, pulled open the drawer where we keep our cookie sheets under the oven, and closed it on her hand. To this day, she still has the Fight Club-ish scar on her hand.

So for a long time after that I felt horribly guilty. There were too many times I freaked out with a shout of “Holly! Get out of the kitchen!”

Things are different now. Holly will be three in September. She is my little helper. So what’s appropriate for toddlers to do in the kitchen? We have some rules (for now).

1. No hot items. See above. If I’m working in the oven, or I have hot oil on the stove, she knows to stay back and pretend in her play kitchen just around the corner from my kitchen.

2. Stand on a step stool to see what’s going on! Knowledge is power and little kids soak up everything. Case in point: Holly sees me getting out certain ingredients together, she knows it’s ice cream time!

3. Give kids tasks they can handle. So what if she botches up an ear of corn? Kids love to feel like they are helping and they’ll take pride in fixing a meal with you. Shucking corn, pouring dry ingredients, or getting bowls out of the cabinets are all ways kids can help feel involved.

4. Explain to them what you’re doing. “We mix the dry stuff together first, so when we add the eggs and milk, it doesn’t get lumpy!”

5. Let them taste as you go. Licking beaters or trying fresh ingredients will help kids develop a palate beyond chicken nuggets and macaroni and cheese.

Holly is becoming a little foodie. It took me a long time to get to where I am in my food journey. This kid was sucking down portobello mushroom lasagna before she was two, now eats plain Greek yogurt and is a pro at the local farmer’s markets. If there was a casting call for Toddler Iron Chef Judges, I’d sign her up in a heart beat.

Spa Infused Herbal Water

For whatever reason, the water served to clients at the spa is always amazing. A hint of herbal something. Sometimes it’s mint and rosemary, or lemon and thyme or some weird herb that I can’t put my finger on.

Lately I’ve come across infusion pitchers all over the place. The last thing I need is another item for my kitchen. So I took the idea and did it in a mason jar with the oddest herb I had in my garden. Lemon Verbena. I haven’t done anything with this herb other than spa infused herbal water.

Spa Infused Herbal Water

Spa Infused Herbal Water

1 clean mason jar

distilled or purified water

herb combo of your choosing
(rosemary/mint, lemon/thyme, basil, lemon verbena)

Fill your mason jar with the distilled or purified water and add the herbs.

Secure the lid and place in a sunny spot for the day. The longer the jar sits out, the stronger the infusion.

Strain the water into a glass with ice and enjoy*.

*exfoliating facial and kid free time not included

Post Navigation